Manchester
Learn the basics of framing with
Nick in Manchester
High wycombe
Learn the basics of framing with
Linette in High Wycombe
| Topics covered | Basics of Framing | Art & Photo Weekend |
|---|---|---|
| Identifying the key elements of a framed picture. | ||
| How to cut a standard mount using specialised tools, for the mounting of a picture. | ||
| Basic methods for attaching a picture to the mount. | ||
| Cutting picture mouldings and joining them to create a frame for the mounted picture. | ||
| Cutting the glass and backboard to fit the frame. | ||
| Assembling the framed picture, including sealing the picture back and adding a hanging cord | ||
| Explore the different presentation and displaying techniques available when mounting a picture. | ||
| Discover and choose the right mount & style for your artwork. | ||
| Learn how to cut double mount. | ||
| Learn how to cut shadow mounts. | ||
| Learn how to float mounts. | ||
| Learn how to plan & cut a multi-aperture mount with several openings for a group of photos. |
🏅 Celebrate the Finish Line: 10% Off Medal & badge Bespoke Framing instore🏅
✖
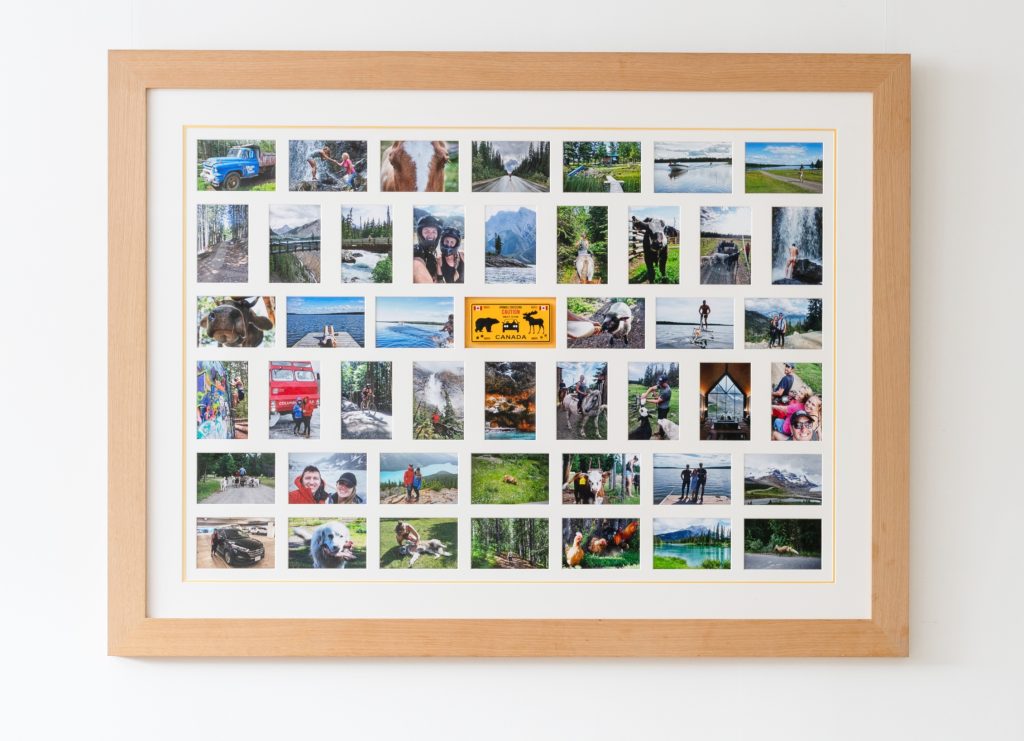
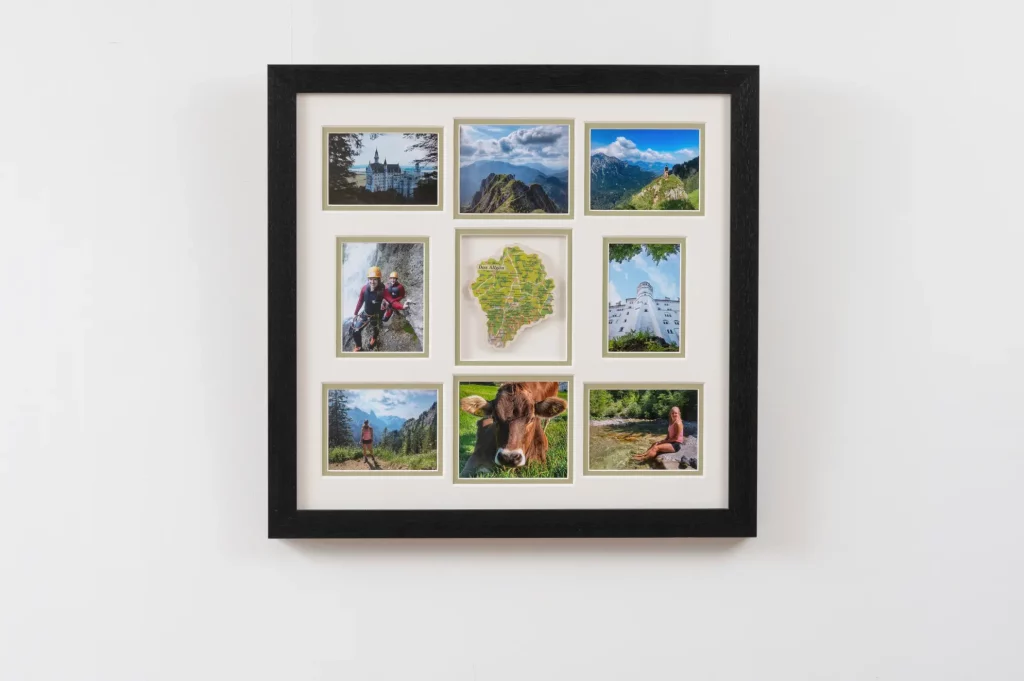
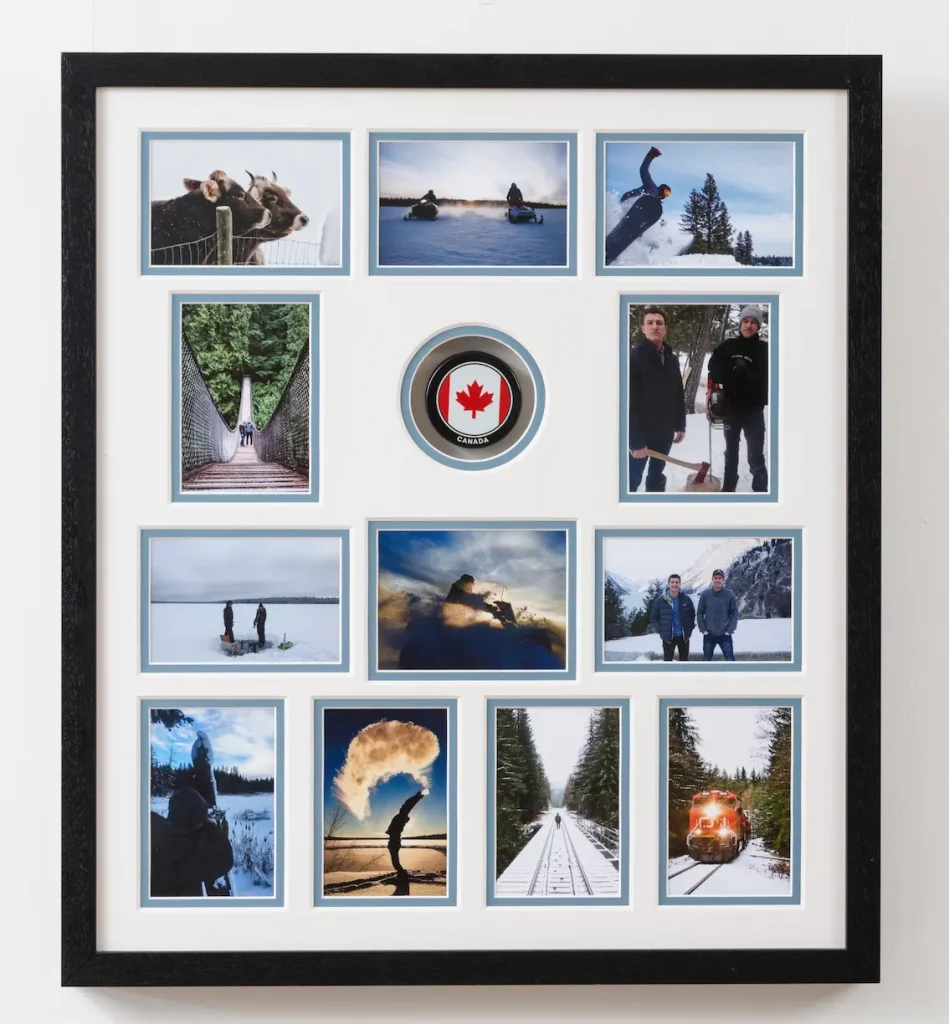
Multi aperture frames, in my personal opinion are the perfect pieces of art for the family home. I often go on holiday with the family and struggle to choose which one photo would look good framed. Instead, I frame collections of them which bring the walls to life. There are a few key guidelines I usually follow when planning something like this (not always, but it’s a good starting point):
Adding a centre point creates an instant draw on the eyes and can be used Instead of captions. By adding a part of your trip, this allows you to truly make it a personal and bespoke frame. For example, The frame shown here has an Ice Hockey Puck, that was used in an Ice hockey match on Christmas Day on a frozen lake in Canada, BC.
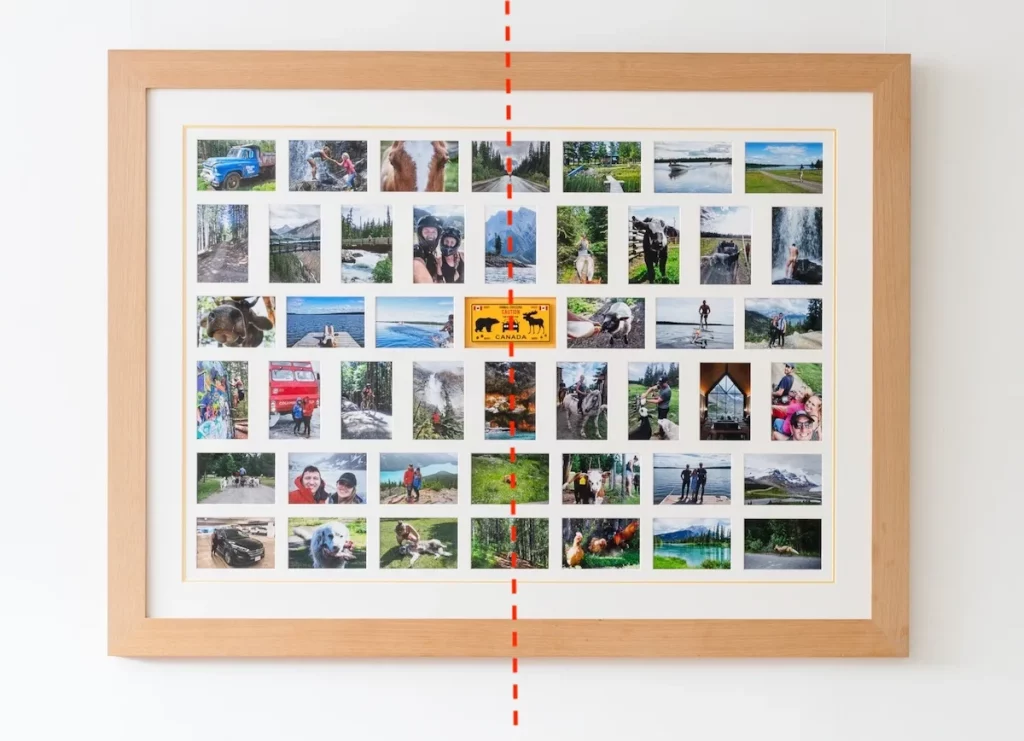
By keeping your mount apertures symmetrical you help to create a balanced look and feel to your frame. Symmetrical objects and shapes are more familiar and play by the rules that our brains are programmed to recognise easily.
Multi aperture frames work great with a second colour/ double mount. A normal approach is to pick a main colour from the central piece and use that as a double mount secondary colour. However, what if that colour doesn’t work? I tend to look at the photos all laid out and see if there is a similar colour scheme throughout, I then use that colour instead.
Of course, they are a lots of other ways to make multiple aperture frames look good but if you’re unsure, here’s a good place to start.
All of the projects above have complicated mounts that require a computerised mount cutter in order to create them. If you would like to explore the possibility of undertaking a project similar to this, please do not hesitate to contact us for a quote.
🕻 01494 459545
9.00 AM – 5:00 PM
Monday – Friday
We provide custom and bespoke framing services in store, where we can help you make a multi aperture frame of your own
Book a free consultation with one of our framing team today to build your perfect frame!


